Showing posts with label Video Editing. Show all posts

Sunday, January 25, 2009

#23 Assembly, Show the Process Of Your Creativity, Step by Step!

There are always more ways then one to do a certain task. Most of them fall into “the easy way” category, or “the hard way” category. As always, I am going to show you the easy way.

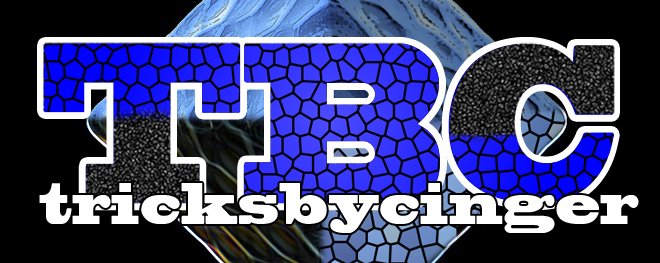
First thing we need is to set up the foundation of our creation. For the sake of practice, I suggest you use an image, with some text, and some room for modification. Something like this:

assembly

I used PhotoShop to make this, but you can make this with even the most basic of software, or even Gimp. If you want, you can use my image to get things started.

We need at least two images to do this, so two can be enough. Youassembly2 have your foundation image(or my image) , now add some more colors to it, or anything you want. Add text or shapes, or anything that you think fits it. 

The Final and easiest part is putting these two images into a video editing software, and combining them with a transition of your choice. My result:

Assembly.avi

I used the two above images and a left-to-right soft transition. Depending on what you have in your images, you might want to try different transitions.

I exported this into a .gif file, but you can just go ahead and make it an .avi file, depending on what you need.

As with all my tricks, this one is simple enough and leaves a lot of room for experimentation and combination. Try using more stages between the foundation and final image. Try different transitions for varying results. You don’t even have to use images. For a quick transition setup, check out this post.

My favorite use for this trick is on videos. A video that you can repeat is a good choice for this to work. The best would be a 3D animation. Render it a few times, but always with different settings. Now, slap some music on, and play with the footage to make an interesting intro:

Unless you haven’t heard, YouTube is muting videos that have music that is copyrighted to WMG. So you should either make your own music, or find some tunes that you can use.

I used music that is under the Creative Commons License, which makes it free to use, under certain conditions. The song used is Lost In Space by Sonic Mystery, that I found on Jamendo. If you have any questions, feel free to post them in the comments!

Friday, January 9, 2009

#15 Sometimes The Best Montage, Is No Montage

Montage – as in, editing your video footage by splitting, or rearranging your scenes, or adding effects.

I say this because it’s a general rule that spontaneous, uncut video can be as good as a well planned and painstakingly edited video, if not better. Sure the spontaneous videos are a rare occurrence, but they should never be forgotten because they always bring the viewer closer to the entire ordeal.

It’s easier for a viewer to get involved, or to connect with the video if it’s natural, or just simply uncut. Sure, it’s harder getting the same polished results you get with timing, planning a editing , but the effort taken can sometimes prove to be easier and more rewarding.

Not much more to tell you here. That’s the entire trick. Just remember to pull out the camera the moment you realize you have something worth filming.

I took this while on vacation, while driving. I was driving, and my lovely assistant held the camera:

(Update: YouTube muted my video cause of the music on the car radio, darn...)

Maybe I just like this video because it reminds of that vacation, but I do enjoy how it fits in with the song that was playing on the radio. I don’t usually make videos like this, but it was interesting to make, and it gave a lot of new ideas for videos. This video refreshes, and inspires me!

I urge you to find out for yourself what inspires you. If you manage to make something that only you like, but it inspires you, then it can become a source of many new great creations!

Tuesday, January 6, 2009

#12 Adding Frames Or Borders To Your Videos

It might look a bit corny or what-not, but I actually had to do this once(albeit a gypsy wedding). That might not be what you are going to use it for, but i am sure you have an idea of your own.

First of all, we need a video to work with. Again, you can use any video for practice. I am going to put up one of my old 3D videos(as soon as I decide which one).

Just so you know what the end result will be in advance, it is a good idea to get a screenshot out of your video, to use in PhotoShop. If you are using Premiere 6.5, just go to:

File –> Export Timeline –> Frame

acdc2

Save it, and open that file in PhotoShop. Now, Create a new layer above it. This new layer will be our video’s border.

The stage is set, now make whatever you want for the border. It doesn’t even have to on the edges. For instance, you could add a crosshair to the video using this technique, and use Premiere’s movement controls to make it move around the screen. You could even use any of the interesting brushes in PS to add leaves or grass to the video.

acdc

After setting this up, delete the background layer(the video frame), and save the frame as a .psd file(a PhotoShop file), because Premiere knows how to work with .psd files. If you save it as a .jpg file, you might have trouble working with the transparency settings, and some ugly clipping will occur.

Now switch back to Premiere and add your video to the timeline and import the .psd file you just saved in PS. Add the frame in the above track and it should all be set without any more hassle from you. I added the music for which this video was built and my end result is:

I made this frame by coloring around with a blue brush, and later with a red brush, then smudging them, and after that I added the mosaic effect. As you can see, you can add any effect you want. Basically you can use anything you make in PhotoShop in your video. It’s pretty simple, all you need is a good idea(as if good ideas are easy to come by).

Wednesday, December 31, 2008

#8 The Special Effect Cycle

So, you are looking for something give your videos some special effects, but you can’t make up your mind on which to use, ‘cause the choices are many, so you decide to use them all, sequentially.

The problem now, is how to fit them in, without the viewer getting a headache. Hard cuts just won’t do it. Here is how I do this.

The software I use is Adobe’s Premiere 6.5, but you can do this in practically any multi-track editing software, and even some single-track editing apps.

First, you have your one longer clip. Split it up where you want the changes to occur. Now you have many parts of that clip. Now, drag every other part into another video track. You should have something to this extent:

hair1

Now, drag the in points and/or outpoints so each clip overlaps with its neighboring clips. And add the basic crossfade transition between them. Like this:

hair2

If you pressed Play now, you would see nothing has changed from the original clip.

The last part I leave to you. Basically, you add the effects you want on your clips in the order you want them. Slap some music on, increase the transitions, and you get a psychedelic music video:

And that’s it. Now that you now the trick, all it takes is a little imagination, and you can make some very dynamic videos. For bigger projects, you might need more time, but the end result is worth it.

Happy New Years Eve!

Friday, December 26, 2008

#4 From Cartoon To Life

I am going to show you how to make a video that turns into an edge magnified version of itself. The easy part is that you don’t have to work with keyframes here, so all you need to know is how to drag and drop any effect onto a clip, how to cut the clip and how to add a transition. And those are some core basics.

The software I am using is Adobe Premiere 6.5, but I know for a fact that this can be done with the same ease in Sony’s Vegas. I don’t know about Windows Movie Maker, but you should move on from that program anyway.

Firstly, you need a video clip to work with. You can even do this with an image, for learning purposes.

Put it on the track, split it down the middle and put the second part in the other track. Now, move the out point of the first track a few seconds to the right, so it actually covers the second track a bit. It should look something like this:

cartoon1

Now, all that’s left to do is to put a transition between the, and any desired effect on one of the clips. Use the “Cross Dissolve” transition, and use the “Find Edges” to get an idea how to use this. And just export this. The result:

Yes, it doesn’t look like much, but you can use this simple trick to  spare you the hassle of working with keyframes, and if you get the right idea, you could make some interesting videos.