Friday, January 30, 2009

#26 Making An Animated Asteroid Field Using Arrays

Sometimes you will want to be able to create a vast number of objects with as little effort, so you can concentrate on the more important parts of your project. This shows you how to do just that! I also made a post on Making an Asteroid!

Let’s say that we need a monotonous asteroid field. Creating one asteroid and copying it doesn’t even sound too bad. But what if you want all your asteroids to move independently? This turns into a bigger task. This is one way to make things easier on you.

For this tutorial, all you need is a sphere. We will leave Modeling an Asteroid for another time, to keep this on point.

Add the sphere to an Array Object(Objects – > Modeling –> Array), and set the Arrays settings like so:

Sphere Array

Sphere Array Settings

If you press the play button now you will see a slow moving asteroid field. That was the desired effect. Things you can do to modify this:

You can copy and intertwine multiple arrays for a bigger and denser asteroid field.The reason why I don’t suggest just increasing the number of copies is that if you look from the top perspective, you will see that the spheres form a circle. So a good Idea would be more smaller arrays, and rotate them around their axis for a more “random” effect.

You could use lights instead of spheres for some interesting jumping lights scenes. Experiment with different objects, and don’t stop on solids.

Asteroid Field

Just add the material for the spheres to the array and you’ll have it applied to all the spheres. Have fun with what you have learned, and think of different uses for the Array object, to make your animating life easier.
#25 Mix Up You Textures And Colors, Create A Cool Logo

With all the 1-click logo making software on the web, you might ask why should you even go through the hassle of making one yourself? The answer is simple. Originality(and brag rights too). If you are using overused templates in logo creation software, chances are your logos style has been done to death.

To get things going, write up the text for your logo in PhotoShop. Rasterize it(right click on the layer, Rasterize Type) and make a couple duplicates of that layer, one on top of the other.

Now, color all of the layers differently. To help you do this, make the layers you are not currently coloring invisible so you can see the layers under them. So lets say you have something like this:

Logo Layers 1

I have 3 differently colored layers. You may have as many as you want of course. The next step is setting up layer masks for all of them. Just select each layer, and click on the little “circle in a square” on the bottom of the layer window.

With this you get a white thumbnail next to your layer thumbnail. It works like this: The areas that are white on this new image are the areas that are visible on the original, and the areas that are black on this image will be invisible. Gray colors grant a level of transparency.Logo Layers 2

Now that you know how this works, use this to mix up the visibility  of the different layers, and don’t forget to use a black(or white) brush with the “Layer Mask”(the white thumbnail) selected.

Logo Preview

This is a pretty simple tutorial, which represents the point of this blog, but as with other tricks, you can use this new knowledge for practice and combination with other skills.

TBCLogo

You can use the same technique on images(in this case, 3D images), and even combine that result with text. Add some formatting to the text, an interesting layout, and you got yourself a logo! Hmm, I think I will be using this one until I make a better one. My first blog logo! Celebration time!

Tuesday, January 27, 2009

#24 Morphing Setup with PoseMixer

A long time ago I used this tool for an animation that required my character to move his lips in accordance to the lyrics of the song in the background. Back then I actually thought that this was the only purpose of the PoseMixer, but by experimenting with it I found many more. For now, I am just going to show you the basics. 

To get things started, create an object in Cinema 4D(PoseMixer is part of Cinema 4D) and make sure it has more then just a few polygons to it, so if you created a cube, increase the number of subdivisions in all sides by at least 2, so you have something to work with.

MorphCube

A cube with all the subdivisions increased to 3. Make it Editable so you can work with its shape. Right click on the Cube’s name and navigate: Character Tags –> PoseMixer.
Something to keep in mind is being organized in you projects. I say this because we are going to create more Cube objects, and we don’t want to keep them named the same. So, make two more Cubes so that you have 3 of them now. Move them away from each other and rename them as follows:

MorhpCube2

The MorphCube(the one with the PoseMixer Tag) is the one that we will use for our animation.

The Default Cube is just the basic shape of the MorphCube when no Pose Mixing is applied. It should be the shape you want for the objects “rest” position.

The TwistCube is what shape our MorphCube will be able to animate to. Things will become clearer as we progress.

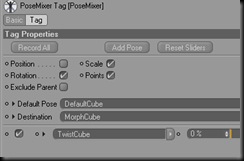
Select the PoseMixer Tag and add the Cubes to their corresponding text boxes:

MorphCube3

Using the slider next to the TwistCube now won’t do anything, so let’s set it up. Go and mess with the TwistCube a little, but don’t do the things that add new points, like Extrude or Bevel. Instead, just move it’s points around, or resize it, to make the shape you want.

Once you are done, select the PoseMixer Tag and try sliding the TwistCube slider. See what happens? The more you slide it, the more the MorphCube becomes like the TwistCube.

To make it look better, put the MorphCube as a child to the HyperNurbs object so you get a better looking shape. The various results are as follows:

MorphCube4

Now you can easily animate your box changing shape by just adding keyframes to the timeline track of the slider for the TwistCube. Make more different shapes that start form the Cube object, and add them to the PoseMixer so you have even more control. Later on I’ll show you more tricks involving this, including how to make your animations lip-synch to the song.

Sunday, January 25, 2009

#23 Assembly, Show the Process Of Your Creativity, Step by Step!

There are always more ways then one to do a certain task. Most of them fall into “the easy way” category, or “the hard way” category. As always, I am going to show you the easy way.

First thing we need is to set up the foundation of our creation. For the sake of practice, I suggest you use an image, with some text, and some room for modification. Something like this:

assembly

I used PhotoShop to make this, but you can make this with even the most basic of software, or even Gimp. If you want, you can use my image to get things started.

We need at least two images to do this, so two can be enough. Youassembly2 have your foundation image(or my image) , now add some more colors to it, or anything you want. Add text or shapes, or anything that you think fits it. 

The Final and easiest part is putting these two images into a video editing software, and combining them with a transition of your choice. My result:

Assembly.avi

I used the two above images and a left-to-right soft transition. Depending on what you have in your images, you might want to try different transitions.

I exported this into a .gif file, but you can just go ahead and make it an .avi file, depending on what you need.

As with all my tricks, this one is simple enough and leaves a lot of room for experimentation and combination. Try using more stages between the foundation and final image. Try different transitions for varying results. You don’t even have to use images. For a quick transition setup, check out this post.

My favorite use for this trick is on videos. A video that you can repeat is a good choice for this to work. The best would be a 3D animation. Render it a few times, but always with different settings. Now, slap some music on, and play with the footage to make an interesting intro:

Unless you haven’t heard, YouTube is muting videos that have music that is copyrighted to WMG. So you should either make your own music, or find some tunes that you can use.

I used music that is under the Creative Commons License, which makes it free to use, under certain conditions. The song used is Lost In Space by Sonic Mystery, that I found on Jamendo. If you have any questions, feel free to post them in the comments!

Friday, January 23, 2009

#22 Ghostly Apparitions

You may, or may not be a believer in ghost stories, but either way you should be aware of how easy it is to fake a ghost in a photograph. 

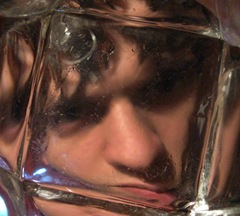
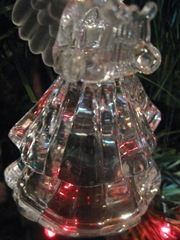
Get yourself a few photos to mix up. I just happen to have a Christmas angel figure, and an eye photo from one of the previous posts.

ghost

Now that you have something to work with, you can start by fading out the “ghosts”, using the opacity slider for the layers. (click to enlarge to see where the opacity slider is)

ghost1


Select the Eraser tool and reduce the tools opacity and set the hardness to zero, so you don’t have hard edges. You can also use one of the techniques in my previous post for soft vignette edges.

Work with what you have, or get better starting photos of course.

Ghost2

This isn’t perfect, but, if you manage to do this, then you will have no trouble making more convincing ghosts. Mess with the curves a little so you get bloody or pure white ghosts. So now, the next time you see a “ghost sighting photo”, think about how easy it was to make. Which doesn’t necessarily mean that it isn’t real, but I will believe it when I see it with my own, non-edited, vision.

Monday, January 19, 2009

#21 Easily Make 3D Chess Pieces In Cinema 4D

I do realize that I have been posting 3D more then a few times in a row, but my choices are limited, since I don’t have all the apps reinstalled yet since my Hard Disk died on me.

This is a pretty straightforward tool to use, but it' can help you model more complex shapes in minutes, or at least give you a better start then the basic box modeling start.

Lets start by modeling a custom chess piece. It’s actually a lot easier then it seems at first thought.

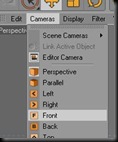
In Cinema 4D, set your camera to Front. chess

Now use the spline tool to make a shape that looks like the left half of a chess piece outline, like this:

chess2

Now all you have to do is add this spline object to a parent Lathe NURBS object. You should see the desired chess piece. If not, then fiddle with the points, and you can even get real time results like this.

Note that this way you can only make shapes that are created when the spline is rotated around the position of the NURBS parent. If you want some different modifications to the objects(such as horns, or spikes) you will need to make the NURBS object editable, and then proceed to use other modeling techniques.

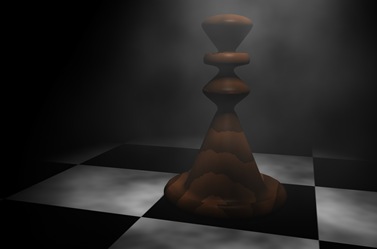
ChessPiece

The Chess Piece still needs some work from where we left off. Fiddle with the points till you get the shape you want, add a material of your choice, and set the scene. This works for most of the chess pieces, but it doesn’t work for the Rook or Knight pieces though. In other words, you need to hone your skills a little more before you can model a full set, so get to it!

Sunday, January 18, 2009

#20 Quick Animation Path, Flying Disc

From time to time, you’ll come up with an animation idea that involves an object flying around, randomly or not. One way is to use the Vibrate Tag. Another way is to set the object on a path.

If you want the objects motion to be in your control, you would probably go with this way.

Using Cinema 4D, create a Cubic spline. Don’t make a Freehand spline because that can make for shaky movement. Your path could look something like this:

Spline

It doesn’t have to look nothing like that, but it should at least be curvy, because sharp edges don’t make for a smooth animation, unless the aim is bouncing of walls or something of the sort.

The next step is adding an object to the path. Create a disc for the sake of practice. Add an Align To Spline Tag to the Disc. Click on the Tag and drag the Spline object in to the Spline Path field.

Now you control the position of the Disc with the Position slide in the Align Tag. Check the Tangential checkbox for a different way of moving on the spline.

Use keyframes to animate the Disc motion on the Path. Use different speeds on the path to kill the monotony.

You can always move the Spline’s points to change the motion of the Disc. The Spline is not visible.

I used a curvy spline, but that is just one of the choices here. There are many possibilities here, along with choice of object, path and speed.

If you want you can even use a SweepNurb to make the spline visible, but more on that some other time.

Thursday, January 15, 2009

#19 Light Through Objects, The Resulting Shadows

On a side note, my hard disk dropped dead this morning, and it took all of my data with it, it seems. But, I am not giving up on this blog yet! I pulled an older picture from my deviantArt account for this post.

Playing with shadows can wield some interesting, and sometimes beautiful results. I'm short on time now, so let's skip to the trick at hand.

(Cinema 4D guide)
Create a cage like object first. It's easy to do this in Cinema. Just put any object you have as child object to the Atom Array object, and Cinema does the work for you.

Now all you need to do is put a light source with it's properties set to show Visible Light and Illumination right inside the object. Combine this with yesterdays post, and put all of this into a huge sphere, with you view from inside. Play with the colors, add some noise to the light and you have yourself:


Caged Light by ~NebojsaC on deviantART

Again, use different shapes, colors and settings. Combine more objects in such scenes, and lastly, share your results! I am thinking of setting up a Submission's Sunday, so that I put up some submissions that are related to my posts, so that me and everyone can see what you made!

Wednesday, January 14, 2009

#18 3D Abstract Image Creation, A World Beyond The Mirror

Why go to the fare to enter a house of mirrors when you can make your own?

Again, really simple to make, even if you have zero-to-no experience in 3D software. Just Create one huge object(sphere or cube) and make sure you are viewing it from inside. Now put some other objects inside it, rotate them around, resize them etc…

If you are using Cinema, create a new material and make sure it’s Reflection checkbox is checked. Add this material to all of your objects in the scene(or at least the biggest one). Here is what I got:

Mirrors1HD

All I have here is a big Cube object and a sphere inside it. The Material on them has the color you see, and the reflection set to 77%. So there are only 2 objects in the actual scene here.

You could try adding some lights to the scene, or give different colors to your materials. Try different things:

Mirrors2HD

In this scene the outer Cube has a Cyclone effect applied to it’s material. A simple 30s scene.

Something to keep in mind when creating Abstract images from 3D shapes, is the fact that there aren’t many rules. So try lots of things. Add some light, play with the lights settings, add various objects, maybe add an array and use different materials on the objects:

MirrorsHD

It’s easy to do, and takes absolutely no time at all. If people don’t like what you make you can always say that it is Art. That term seems to be tossed around pretty loosely these days, so hop on the bandwagon!

Tuesday, January 13, 2009

#17 Beer Goggles

So, you feel like not moving away from your couch, and you happen to have your camera close by, and some empty beer bottles on the table. Remember the Through Glass trick? The same applies here.

bear gogles2

The empty bear bottle vortex! Try it. Differently colored beer bottles give you different results.


You can also use it as an extra lens. If you can get a girl to pose for you, you could make a beer commercial photo. If you can’t get anyone, then I guess you will have to do:

bear gogles1

Some factors include the beer envelope, if it has one, and the background light. Make sure you don’t use your flash, and that there is no light shining directly on the camera’s side of the bottle, because light reflecting on it’s surface will render you unable to see through the bottle.


Once you have the photo, get it into PhotoShop if need be, to increase the contrast, or to blur out the unnecessary or to sharpen what you need to be seen.

bear gogles3

Of course, if you have to use too many tools to make the details visible, then you are better off just retaking to photo. To much manipulation and you will just end up with an abstract picture, so take it easy.

Monday, January 12, 2009

#16 Easy Do-It-Yourself Frames for Photoshop, Special Effects

Not so long ago I showed you how to make easy vignette frames for your pictures. Well, now are kicking it up a notch.

Open the photo you want “manipulated” in PhotoShop(I am using CS4, but you can do it in an older version with no difference in procedure). Use any selection tool to highlight the part of the picture that you don’t want to change and add a feather value of 20(or whatever you want actually) like so:

frameef

(click to enlarge). Now, right click the selection and then Select Inverse. Now you can start adding your effects.

Now that you have the outer side selected, you can use any brush tool, or adjustment, on just that area. I suggest clicking on Filters and experimenting with the various choices there.

HeadBang

This is what you can get if you use the Glowing Edges Filter.

Of course, you can use any random shaped selection for your frames, you don’t have to use the standard selection tools. And you can use this trick for more then just frames. PhotoShop does all the work for you:

Find Edges

Color Curves

Invert

It’s really simple to do, and all you need is a photo to work with and some ideas. It only takes about half a minute once you get the hang of it. You might discover a side of you that you never knew!

Friday, January 9, 2009

#15 Sometimes The Best Montage, Is No Montage

Montage – as in, editing your video footage by splitting, or rearranging your scenes, or adding effects.

I say this because it’s a general rule that spontaneous, uncut video can be as good as a well planned and painstakingly edited video, if not better. Sure the spontaneous videos are a rare occurrence, but they should never be forgotten because they always bring the viewer closer to the entire ordeal.

It’s easier for a viewer to get involved, or to connect with the video if it’s natural, or just simply uncut. Sure, it’s harder getting the same polished results you get with timing, planning a editing , but the effort taken can sometimes prove to be easier and more rewarding.

Not much more to tell you here. That’s the entire trick. Just remember to pull out the camera the moment you realize you have something worth filming.

I took this while on vacation, while driving. I was driving, and my lovely assistant held the camera:

(Update: YouTube muted my video cause of the music on the car radio, darn...)

Maybe I just like this video because it reminds of that vacation, but I do enjoy how it fits in with the song that was playing on the radio. I don’t usually make videos like this, but it was interesting to make, and it gave a lot of new ideas for videos. This video refreshes, and inspires me!

I urge you to find out for yourself what inspires you. If you manage to make something that only you like, but it inspires you, then it can become a source of many new great creations!

Thursday, January 8, 2009

#14 Through Glass, A Different Perspective

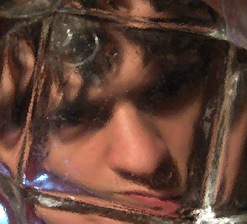
Grab your camera, and look for any and all transparent objects. Preferably glass objects without smooth shapes. If the object is smaller, such as a glass(for my examples), set it between the camera and a subject(like you, for instance).

Glass1

Rotate the glass, zoom in and out, improvise until you are satisfied with the result. You are not prohibited from having a little fun in PhotoShop of course. I first use the Dust & Scratches tool to remove the obvious on the picture, and later used the Glass tool just for fun. The results:
Glass2

Glass3

Zoom in for greater detail.


Experiment with Color Curves for various effects. Just go crazy!


GlassWithCurves

Curve it the right way and you are on your way to create a B horror movie.


Enough fun for now. I just happen to have this square drinking glass, so it’s good for some fun, but any glass will do. Rotate, snap, add effects, edit the Curves. Enjoy the effects!

#13 Create Cool 3D Objects With a Single Tool In 30 Seconds, Matrix Extrude

This tool is indigenous to Cinema 4D, but I don’t really know if the other big 3D apps have it. You could be able to make the same effect with just the extrude and bevel tools, but would take too much time and effort, and that just defeats the purpose of this post.

What this tool does is perform a chain of extrude operations on the polygons you select. You can select the number of extrudes, or joints, and you can make it shrink toward the end. You can make it bend or twist as the extrude grows, making for some very interesting effects.

The two basic ways I use this tool are as follows:

Short Matrix Extrude for surface modeling:

MatrixExtrude1

Just create a basic sphere and make it editable. Now, with the polygon tool selected select the Matrix Extrude Tool, and use it on the sphere once. If your PC can handle it, use it again to get the same effect like me, add a gradient color to it and give it a HyperNurbs parent for a curvier surface.

Long Matrix Extrude for shape transformation:

MatrixExrtudeFontain 

This started out as a basic tube, and after a double extrusion(one longer first, and one shorter afterwards), and coloring, it becomes this, in basically less then 30s.

Once again, the bottom line is experimenting. Use different objects for starting out, even your own custom-objects. Don’t always use all of the polys, select polygons in circular formations and see what happens. Try various color combination(gradient makes wonders here). Anyway, it’s up to you. I am already late with posting this(I missed yesterday), so it’s up now(after midnight).

Good night everyone!

Tuesday, January 6, 2009

#12 Adding Frames Or Borders To Your Videos

It might look a bit corny or what-not, but I actually had to do this once(albeit a gypsy wedding). That might not be what you are going to use it for, but i am sure you have an idea of your own.

First of all, we need a video to work with. Again, you can use any video for practice. I am going to put up one of my old 3D videos(as soon as I decide which one).

Just so you know what the end result will be in advance, it is a good idea to get a screenshot out of your video, to use in PhotoShop. If you are using Premiere 6.5, just go to:

File –> Export Timeline –> Frame

acdc2

Save it, and open that file in PhotoShop. Now, Create a new layer above it. This new layer will be our video’s border.

The stage is set, now make whatever you want for the border. It doesn’t even have to on the edges. For instance, you could add a crosshair to the video using this technique, and use Premiere’s movement controls to make it move around the screen. You could even use any of the interesting brushes in PS to add leaves or grass to the video.

acdc

After setting this up, delete the background layer(the video frame), and save the frame as a .psd file(a PhotoShop file), because Premiere knows how to work with .psd files. If you save it as a .jpg file, you might have trouble working with the transparency settings, and some ugly clipping will occur.

Now switch back to Premiere and add your video to the timeline and import the .psd file you just saved in PS. Add the frame in the above track and it should all be set without any more hassle from you. I added the music for which this video was built and my end result is:

I made this frame by coloring around with a blue brush, and later with a red brush, then smudging them, and after that I added the mosaic effect. As you can see, you can add any effect you want. Basically you can use anything you make in PhotoShop in your video. It’s pretty simple, all you need is a good idea(as if good ideas are easy to come by).

Monday, January 5, 2009

#11 Easy Do-It-Yourself Frames for Photoshop, Vignette

If you are tired of looking for various instant border, frame or vignette plug-ins, or you just prefer having a higher degree of control with your work, this might be just the ticket.

It’s actually quite easy to do. It’s a simple trick, which is this blogs main content.

For starters, you need a photo, or picture for yourself. For practice’s sake, even a pattern-filled page will do. Our first objective is the simple Vignette effect:

frame1

After you have opened the photo you want to work with, copy that layer, and delete the original background layer. Now, create a new layer, color it however you want(gradient is fine too) and set it bellow the photo.

Once you decide what shape you want(square, ellipse etc.) choose the selection tool(depending on which shape you want) and select the area of the image you want to keep. Add feather to your selection(the procedure for this varies depending on your PhotoShop version) 30 px will do, just to get things started. Now, right click the image and choose Select Inverse. Now, press delete. Ding! It’s done!

The possibilities:

You can use different shapes. Even irregular ones, if you use the freehand tool.

You can use different colors, gradients, or even other images.

You don’t have to use soft(feathered) edges, you can have simple, hard cuts.

You can have two or more focus points(example below).

Most importantly, be creative, and know what you want. Experimenting, that’s the key with any tip or trick on this site.

To have more focus points, select your entire image(with the square selection tool, or Select All command), and use the selection tools in combination with feathering and the ALT key to deselect the areas you want to keep. Delete, and pick a color through your background layer(like before).

NOTE: You don’t have to keep using Black, but I use it cause it goes well with my BBB(black blog background).

frame2

Once you get the hang of it, many possibilities will open up. I will be covering some other uses for the selection tool in the future, until then, experiment, and you may even find it out by yourself.

I’ll be watching you!(or she will, I guess)

Friday, January 2, 2009

#10 Glowing Shadow

Yeah!I made it to the tenth post without any real delays! The only problem is, I seemed to have lost track of the order of post topics. Yesterday was supposed to be photography, but I am going to make up for it right now!

One way to make unique(and possibly beautiful) photos is to have some interesting objects others don’t. In this case, glass objects.

One interesting aspect of a glass object is its shadow. Observe:

Glass Heart Glowing Shadow

Especially if it has an interesting shape, such this glass heart keychain. This can be done with any glass or moderately see-through object such as a chandelier(if you can take off the ceiling, of course).

Granted, you might not have anything extraordinary in your possession, but there is always something. The simplest example would be a glass of water:

Simple Glowing Shadow

This has numerous possibilities, such as adding some floating colored objects to it, or some dense colored liquid, or even ink. I leave you to experiment. Feel free to share your results with us(or me, at the moment).


The basic thing allowing such shadows, is the fact that the glass objects(or water filled glass objects) let light pass through, more often then not changing its shape and direction. This can be used in another interesting way.

Glass Heart It has the ability to make the glass objects reflect in themselves. This makes for interesting photos, in my opinion.

My family’s Christmas decoration, “Guardian Angel” makes for some interesting photo shoots:

Glass Angel

Blody Glass Angel

My tip for today: Experiment with various glass objects, with different lights(differently colored and positioned). I am sure that you can make some marvelous effects with even the simplest objects and decorations. And remember, try it with and without the camera’s flash, for more variation!