Sunday, February 22, 2009

#31 Fix Up Your Makeup In PhotoShop

If what the current internet trends are any indication, then you can’t have a photo of you on a social site without at least a little retouching.

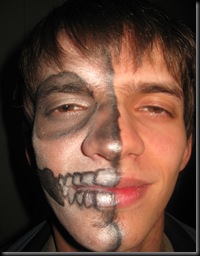
Well, for starters, you need a photo to fix up. This is a guy writing this, so I won’t be working with what you would expect for “makeup”:

MakeUp1

I was amazed how this turned out, I wouldn’t of changed it, but it will be great for today’s trick.

The white isn’t completely white, and the black isn’t completely black. We have some smudges here and there, and some flash reflection to get rid of.

The first thing we should do is fixing the glow from the camera’s flash. We are going to use Color Curves to help us single out the flashed parts.

Make a copy of the one layer you have, and put it above the main layer. Now, select that new layer and open the color curves tab.

MakeUp2Once you make the curve to look like mine(see above), spotting the patches with too much light is easy. One of mine is above the eyebrow and there are 2 more on the lips, and one on the nose.

Use any selection tool to select the patches that need some flash reduction, and feather the edges of your selections.

Now hide this layer by clicking on the eye icon next to it on the layer window. Select the visible layer and open up the Curves again.
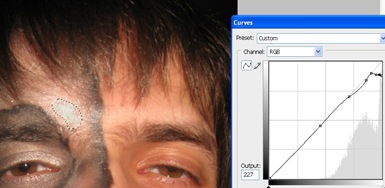
MakeUp3This way we can reduce the whiteness so we can continue to work with the image, but salvaging completely the color that was under there is a different thing. This is why you have to mind how and when you use your camera flash.

Next step: Fixing the white and black colors.

Since they are simple black and white colors, we can use the Dodge and Burn tools, but if it were any other color, we would need to use the brush. This is why I am going to show you how to use the brush tool, so you can fix any faded color.

Select the Brush tool and the color you need. I will start with a white, and continue with a black brush.

MakeUp4

Set the Brush opacity to about 30%, and start brushing up the photo. When working around your hair, lower the opacity, and when working with nooks and crannies reduce the brush size.

The same goes for any color.

Take your time, and fix it up as you see fit.

MakeUp5

MakeUp1


The before and after shots. That’s one way to fix up your make up. I could of done the lips too, with any color available.

So the next your makeup is faded on your photos, just spruce it up in PhotoShop.
Friday, February 13, 2009

#30 Make Hearts Quickly in Photoshop

With Valentines day coming up tomorrow, I thought that this was a more then appropriate post to make. Maybe it will save someone the hassle of using worn-out templates, and done-to-death pictures.

Ok, start open a new page in Photoshop, with the size you want and the background color you want, and let’s get started.

Select the pen tool and just punch in these points, with the tool shown selected(close the path by clicking on the first one you made):

Heart

With the Pen Tool selected, hold down the CTRL key, and click on one of the edges to get the points to show(left).Heart2 Now hold downHeart3 ALT and click on the point and drag away from it, and see what shapes you get(right)

Repeat this for all the points except the two ones in the middle. Curve it any way you want of course.

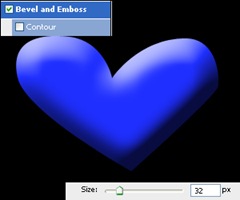
Enter the layer style menu, and check the Bevel and Emboss tab, and increase the size to get a nice rounded shape:

Heart4

No Valentines Day heart would be complete without the letters carved in right?

Make the text that you want, and give it a color that you want and set it’s layer style as follows:


Heart 5Again, the possibilities are only limited by your imagination. A couple of quick tricks: try using a gradient color, different Bevels, add this to a photo of the two of you, and try unconventional heart shapes. Experiment!

She/he will appreciate anything you spend some time on for her/him, so don’t keep it too simple.

Thursday, February 12, 2009

#29 Modeling An Asteroid In Cinema 4D

As always, there are at least 2 ways to go about doing this. One way is modeling it polygon by polygon, but that’s kind of a stretch, so we will be using an easier way, in accordance with the tradition of this blog.

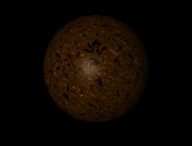
Start off with a sphere, and make it editable(of course after you have set the subdivision count). Create a new material, so we can start working with this.

For the color, you should ask yourself what does an asteroids color look like? I don’t really know, but I can imagine it depends on where it came from, but I use the standard mud/rock color mix.

In the color tab set the color to Noise, and choose which colors you see fit. A mix of 2 shades of brown might work, or you could add some black to it. Your choice. You might even want to choose different noise types. For experimentation purposes, I chose Zada:

Asteroid1Now take check the Displacement checkbox, and in the Displacement tab give him a Noise color again. Leave the colors black and white this time, and increase the Global Scale to 500%. Once you’ve done that, go back to the Displacement tab, and increase the height as you see fit.

Turn of the Specular checkbox, so you don’t have the shine. In the end, you might want to put it in a HyperNURBS object, but I only recommend this if you won’t be using too many of these in a scene.

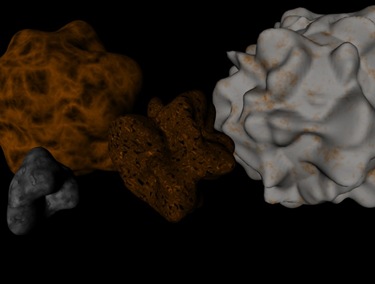
Asteroids

The results vary depending on what colors, types of noise, and sphere size you use, but if you know exactly what you need, then you’ll probably find a way to make it. You are now one step closer, to making your own Asteroid field.

Monday, February 9, 2009

#28 Morphing Letters Animation in Cinema 4D

You don’t always have to move the letters you have on your screen to replace them with other letters. With this technique you can make your letters change their shape into other letters. You can also do this with words, once you get the hang of it. It would be a good idea to check out my post on Morphing Setup with PoseMixer, to make it easier to follow this post.

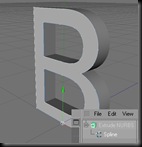
To get things started, we have to make sure that the first letter we will use has enough points to be able to morph into every other letter we use. MorphLetter

I am going to start with the letter “B” because those two holes, which we will be able to use. Create a Text Object, and make it show the letter “B”. Make it Editable and put it under an Extrude Object.

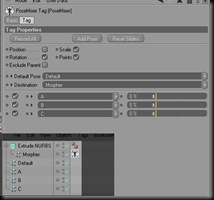
MorphLetter2We will make it able to easily morph into the letter A, B and C. Make the following setup in the PoseMixer Tag. All the spline objects are copies of the first spline. Make sure to rename them the same way as on the picture( to the left).


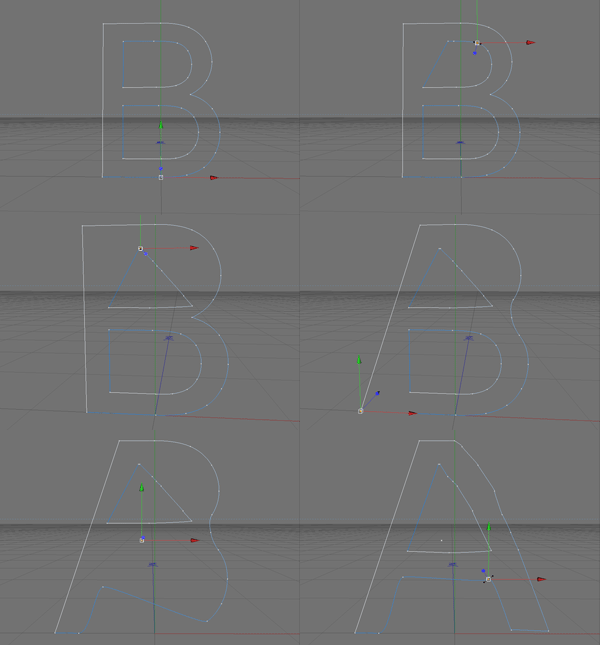
Now that you have the PoseMixer set up, now you can proceed to shape the letters A and C. Hide all the other objects one working on one of the letters, and work with the points. Remember not to add or delete any of the points. If you have some extra points, either align them with the others, or scale them down. The process of making the letter A:

MorphLetter

You can make as many letters as you like, and add them all to the posses list at the PoseMixer tag.

All you have to do is animate the sliders for the corresponding letters, and you got your self morphing letters.

MorphLetter2

Depending on how much time you have on your hands, and how perfect you want it to be, this might take a while. You can also do this with entire words, so it can actually be quiet interesting. You might even want to leave the imperfections, or make graffiti-like letters. I was thinking of making an entire song like this. It might take a while, but it can look great!

Saturday, February 7, 2009

#27 A Chess Set In Cinema 4D, The Rook Piece

In a previous post, I showed you the basics of making chess pieces in Cinema 4D. Now we are kicking it up a notch and making a Rook piece.

First, take a look at the shape. It’s different from most of the other pieces. Obviously we can use the Lathe NURBS tool to make most of the Rook, but not the top. So we will model the body first, and leave room for the tower-like top. Image taken from Wikipedia.

You can use the above reference for the Rook’s shape, or you can make one yourself. I improvised. In case you haven’t read the previous chess post, I’ll run you through the basics:

ChessRook

Set your view camera to Top, and use the Spline tool to make a shape that looks like the outline of half of the Rook(without the top). Now just put that Spline to be a child of the Lathe NURBS object. My result below:

ChessRookBody

Now that you have this, you can proceed to model the of the Rook. I can tell you 3 ways to do this(of the top of my head).

One way is to use multiple Cube objects to shape the top. Another way putting a Cube object into an Array Object(I’ve showed you this tool before). And the third way(the one I am going to use) is as follows:

ChessRookTop1 First thing you need to do is create a Tube object. Take that tube object and put it on top of the Rook’s body. Set it’s Inner and Outer Radius so it matches the position of the tower walls that you want.

Now take make the Tube editable(the shortcut key is C) and select the polygon tool. Proceed to delete the polygon blocks two by two, skipping every other pair. Something like this:ChessRookTop2

ChessRookTop3


You have these gaps now. Close them using the Close Polygon Tool, and you have yourself a Rook!

Chess Rook

I added a Plane object beneath with a checkerboard material. Cinema also has a wood surface generator included, so I used that too.

I showed you how to model another chess piece. Soon(once my exam week ends) I will show you how to model the other pieces.

Checkmate.