A long time ago I used this tool for an animation that required my character to move his lips in accordance to the lyrics of the song in the background. Back then I actually thought that this was the only purpose of the PoseMixer, but by experimenting with it I found many more. For now, I am just going to show you the basics.
To get things started, create an object in Cinema 4D(PoseMixer is part of Cinema 4D) and make sure it has more then just a few polygons to it, so if you created a cube, increase the number of subdivisions in all sides by at least 2, so you have something to work with.
A cube with all the subdivisions increased to 3. Make it Editable so you can work with its shape. Right click on the Cube’s name and navigate: Character Tags –> PoseMixer.
Something to keep in mind is being organized in you projects. I say this because we are going to create more Cube objects, and we don’t want to keep them named the same. So, make two more Cubes so that you have 3 of them now. Move them away from each other and rename them as follows:
The MorphCube(the one with the PoseMixer Tag) is the one that we will use for our animation.
The Default Cube is just the basic shape of the MorphCube when no Pose Mixing is applied. It should be the shape you want for the objects “rest” position.
The TwistCube is what shape our MorphCube will be able to animate to. Things will become clearer as we progress.
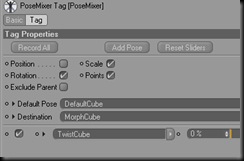
Select the PoseMixer Tag and add the Cubes to their corresponding text boxes:
Using the slider next to the TwistCube now won’t do anything, so let’s set it up. Go and mess with the TwistCube a little, but don’t do the things that add new points, like Extrude or Bevel. Instead, just move it’s points around, or resize it, to make the shape you want.
Once you are done, select the PoseMixer Tag and try sliding the TwistCube slider. See what happens? The more you slide it, the more the MorphCube becomes like the TwistCube.
To make it look better, put the MorphCube as a child to the HyperNurbs object so you get a better looking shape. The various results are as follows:
Now you can easily animate your box changing shape by just adding keyframes to the timeline track of the slider for the TwistCube. Make more different shapes that start form the Cube object, and add them to the PoseMixer so you have even more control. Later on I’ll show you more tricks involving this, including how to make your animations lip-synch to the song.


No comments:
Post a Comment